Step 1: Look closely at the smash repaired area
Naturally the first thing you should check is the panel(s) that were originally damaged. You want to ensure the area has been smash repaired to its original state, before the dent, scratch or damage occurred. If you have any old photos of the car before it was damaged it’s good to use these for reference, so you can compare the smash repairs to the state of your original car.
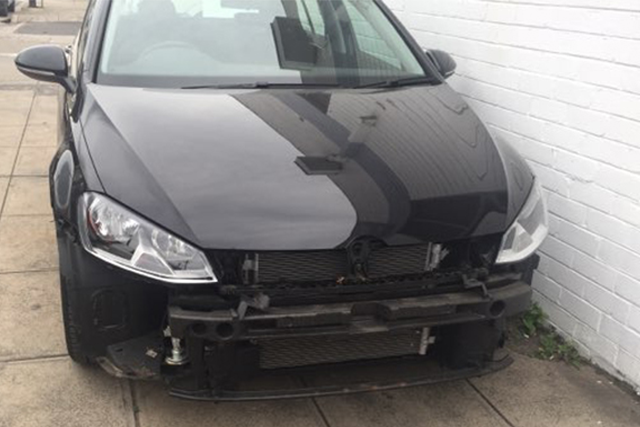
For most types of damage, the panel is removed in order to smash repair it. If you’re worried, you should ask the panel beater to show you a photo of the car without the panel as proof they smash repaired it properly rather than just touched it up. The example pictured below required a bumper smash repair after their bumper was dented and the paint scratched.
Step 2: Check the quality of the paint job or peel
Now you are satisfied your car and damaged panel(s) looks like they did originally, you will want to check the quality of the paint job. If you received a Paintless Dent Removal (PDR) repair then this won’t be necessary, however most smash repairs will require some sort of painting or respraying and therefore can’t be fixed with PDR.
To check this you will want to get up close to the repaired panel, then look at it from an angle so you can see the light reflecting off it and see how smooth the surface of the panel is. What you are looking at is called the ‘peel’. This is the smoothness of the new paint respray. The better the paint respray the smoother the paint (like how your original car panels look elsewhere on the vehicle). The worse the paint respray the more the surface of the panel will look like the skin of an orange (that’s why it’s call the ‘peel’).
To help you know what you are looking for, the easiest thing to do is just compare your repaired surface area with an original panel elsewhere on the vehicle.

Step 3: Check the inside edges of the smash repaired panel
Now you have checked the smash repaired panel from the outside you want to check it from the inside. If the panel wraps into any other visible parts of the car, for example a door well or a boot well, then you want to check that area too as it will have been part of the respray repairs. What can happen with lazy repair jobs is they will not seal the inside of the panel effectively. ‘Overspray’ will create a build up of paint or ‘clear coat’ (the protective layer added on top of the paint) on the panel beneath the seal .
In the example below the panel on the back left wheel arch was scratched and scuffed leaving their driveway.
ORIGINAL DAMAGED PANEL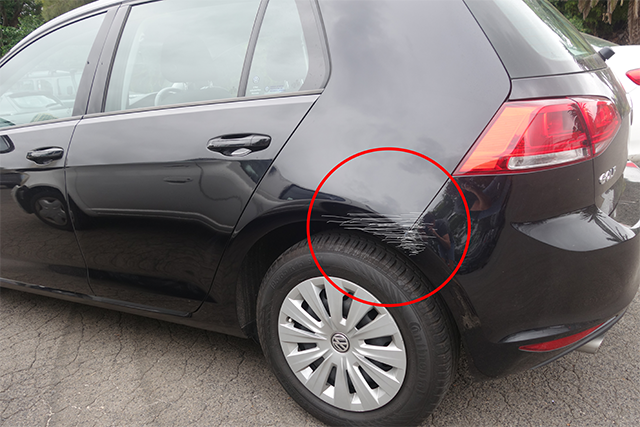
OVERSPRAY ON INSIDE ROOF OF DOOR WELL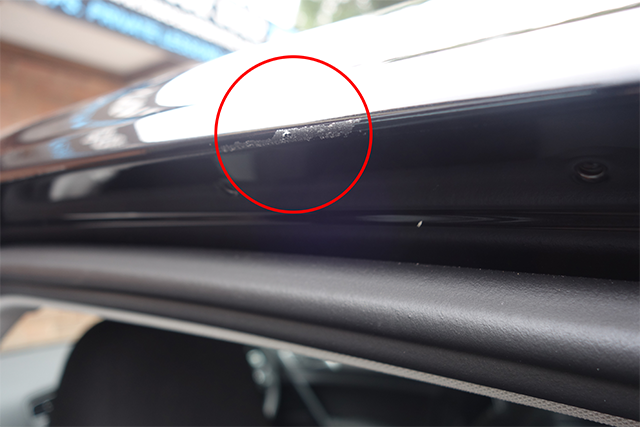
Step 4: Check the surrounding panels
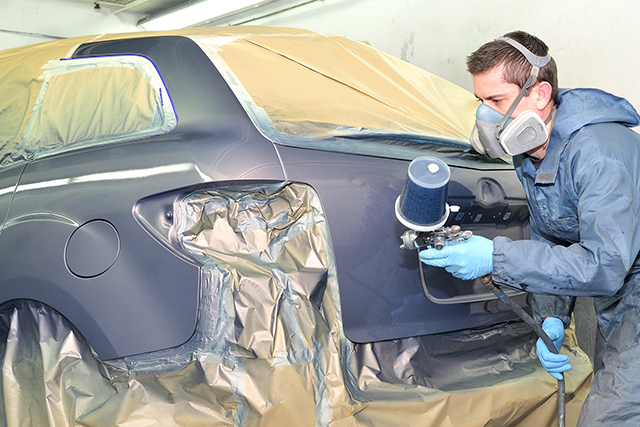
Depending on the age of your car and the amount of sun and exposure it has seen in its lifetime, the surrounding undamaged panels of the car may need to be resprayed as well in order to match the newly painted panel. If you put a new lick of paint on an old sun faded car then that new panel will stick out like a sore thumb. This process is called ‘blending’, and you can learn more about it here.
Your panel beater should have advised you upfront as part of the quote process if any surrounding panel blending was required. If not, then you need to check if it’s required when you are reviewing your smash repaired car. If the newly fixed panel doesn’t match those surrounding it then it will be clear to anyone (if you are looking to sell your car) that the car has been involved in an accident previously.
Step 5: Do a final walk around the smash repaired vehicle
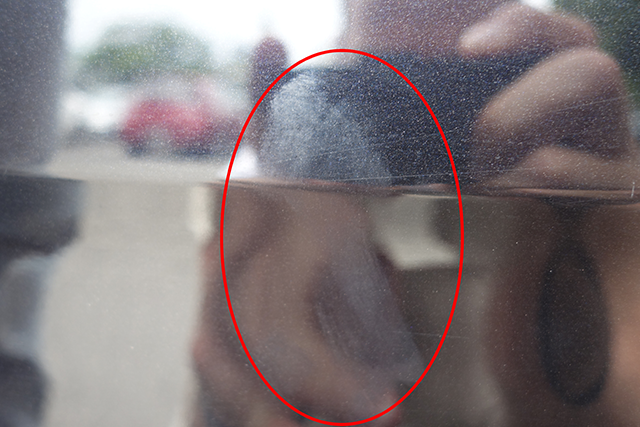
The final check you should do is a quick walk around the smash repaired car. This may not seem necessary given you have thoroughly inspected the panel and surrounding areas they were repairing, but a poor panel beater might end up damaging your car elsewhere during the repair process. In the below example the panel beater has accidentally left a thumb print on the boot which is the result of them having clear coat on their hands, then touching the boot accidentally. This may just look like just a smudge but it’s actually permanent and can’t be cleaned off. It needs to be professionally removed.
Remember
Not all smash repairs are created equal (especially if you didn’t get to choose your repairer). Next time you go to pick up your car, regardless if it was dented, scratched, hail damaged or had a mirror smashed, you should do these 5 simple quality checks BEFORE you accept your car back so you can ensure the panel beater has done the best job possible for you and your car.
Naturally the first thing you should check is the panel(s) that were originally damaged. You want to ensure the area has been smash repaired to its original state, before the dent, scratch or damage occurred. If you have any old photos of the car before it was damaged it’s good to use these for reference, so you can compare the smash repairs to the state of your original car.
For most types of damage, the panel is removed in order to smash repair it. If you’re worried, you should ask the panel beater to show you a photo of the car without the panel as proof they smash repaired it properly rather than just touched it up. The example pictured below required a bumper smash repair after their bumper was dented and the paint scratched.
Step 2: Check the quality of the paint job or peel
Now you are satisfied your car and damaged panel(s) looks like they did originally, you will want to check the quality of the paint job. If you received a Paintless Dent Removal (PDR) repair then this won’t be necessary, however most smash repairs will require some sort of painting or respraying and therefore can’t be fixed with PDR.
To check this you will want to get up close to the repaired panel, then look at it from an angle so you can see the light reflecting off it and see how smooth the surface of the panel is. What you are looking at is called the ‘peel’. This is the smoothness of the new paint respray. The better the paint respray the smoother the paint (like how your original car panels look elsewhere on the vehicle). The worse the paint respray the more the surface of the panel will look like the skin of an orange (that’s why it’s call the ‘peel’).
To help you know what you are looking for, the easiest thing to do is just compare your repaired surface area with an original panel elsewhere on the vehicle.
Step 3: Check the inside edges of the smash repaired panel
Now you have checked the smash repaired panel from the outside you want to check it from the inside. If the panel wraps into any other visible parts of the car, for example a door well or a boot well, then you want to check that area too as it will have been part of the respray repairs. What can happen with lazy repair jobs is they will not seal the inside of the panel effectively. ‘Overspray’ will create a build up of paint or ‘clear coat’ (the protective layer added on top of the paint) on the panel beneath the seal .
In the example below the panel on the back left wheel arch was scratched and scuffed leaving their driveway.
ORIGINAL DAMAGED PANEL
OVERSPRAY ON INSIDE ROOF OF DOOR WELL
Step 4: Check the surrounding panels
Depending on the age of your car and the amount of sun and exposure it has seen in its lifetime, the surrounding undamaged panels of the car may need to be resprayed as well in order to match the newly painted panel. If you put a new lick of paint on an old sun faded car then that new panel will stick out like a sore thumb. This process is called ‘blending’, and you can learn more about it here.
Your panel beater should have advised you upfront as part of the quote process if any surrounding panel blending was required. If not, then you need to check if it’s required when you are reviewing your smash repaired car. If the newly fixed panel doesn’t match those surrounding it then it will be clear to anyone (if you are looking to sell your car) that the car has been involved in an accident previously.
Step 5: Do a final walk around the smash repaired vehicle
The final check you should do is a quick walk around the smash repaired car. This may not seem necessary given you have thoroughly inspected the panel and surrounding areas they were repairing, but a poor panel beater might end up damaging your car elsewhere during the repair process. In the below example the panel beater has accidentally left a thumb print on the boot which is the result of them having clear coat on their hands, then touching the boot accidentally. This may just look like just a smudge but it’s actually permanent and can’t be cleaned off. It needs to be professionally removed.
Remember
Not all smash repairs are created equal (especially if you didn’t get to choose your repairer). Next time you go to pick up your car, regardless if it was dented, scratched, hail damaged or had a mirror smashed, you should do these 5 simple quality checks BEFORE you accept your car back so you can ensure the panel beater has done the best job possible for you and your car.